
3.30.2015
My KVM Guide Part IV: PIecing it All Together
I don't have a whiteboard in my cube yet, so you have the luxury of a napkin diagram. The following shows how end user interfaces such as virsh, virt-viewer and virt-manager interface with libvirtd, and in turn with KVM.

3.27.2015
My KVM Guide Part III: Overview & Components
Alright, since we already know at a very high level what KVM is (a hypervisor), let’s delve into the different components that it is comprised of. KVM is implemented as a kernel module that can be loaded to transform Linux into a Virtual Machine Manager (VMM). As Linux already had all of the tools and mechanisms needed to house several VMs, the developers just needed to add a few components to support virtualization. Each process in a standard Linux environment runs in one of two modes: user-mode or kernel-mode. The advent of KVM introduced a third: guest-mode, which relies on a virtualization capable CPU. With guest-mode, certain instruction sets can be “trapped”, so to speak. In KVM, each VM is implemented as a process, which relies on it’s scheduler for the assignment of computing power to the virtual machines; memory is allocated via the Linux memory allocator.

The two components that make up KVM are: /dev/kvm and QEMU (Wow, it's that simple!). Once the KVM kernel module is loaded (this is not enough to run virtual machines on all by it’s lonesome), the /dev/kvm device node appears in the file system. The hypervisor can be controlled through this interface via a set of ioctls - system calls that execute operations to create new and assign resources to VMs. KVM also used a generic emulator Quick Emulator, better known as QEMU to present hardware to the VMs. For each virtual machine, a separate QEMU process is started in user-mode, and certain emulated devices are virtually attached. Read and write I/O operations from the VM are intercepted by the hypervisor and redirected to the associated QEMU process for that specific guest.
“Since a virtual machine is simply a process, all of the standard Linux process management tools apply: one can destroy, pause, and resume a virtual machine with the kill command (or even using Ctrl-C and similar keyboard shortcuts) and view resource usage with top. Permissions are handled by the normal Linux method: the virtual machine belongs to the user who started it (which need not be root; all that is required is access to /dev/kvm), and all accesses are verified by the kernel.”
Sources: http://www.linuxinsight.com/files/kvm_whitepaper.pdf
http://www.cs.hs-rm.de/~linn/fachsem0910/hirt/KVM.pdf
My KVM Guide Part II: KVM History
A bit of history on KVM (wow, really? I feel like I am writing a paper for grade school):
KVM was developed by a low-profile Israeli startup called Qumranet (pronounced: coom-rah-net), which was formerly known as Comanet. The company was founded in 2005 by Benny Schnaider, Rami Ramir, Moshe Bar and Giora Yaron, and was sold to RedHat in 2008 for $107 million (The KVM software was initially written by Avi Kivity).
KVM is a Type 1 hypervisor. If you are not familiar with hypervisor types, there are 2. I will let you guess what they are called. Type 1 hypervisors run directly on a host to control underlying hardware and manage guest VMs (i.e. KVM, ESXi, Hyper-V). Type 2 hypervisors run on top of a standard operating system (i.e. VirtualBox/VMware Fusion). “KVM is one of the most popular open-source virtualization technologies in use today - the first to be integrated into the vanilla Linux kernel. Both IBM and Red Hat use it as the basis for their Linux virtualization technologies, and it is the most widely used virtualization technology in the OpenStack cloud as well.” Source: http://www.eweek.com/cloud/how-did-kvm-virtualization-get-into-the-linux-kernel.html
KVM was developed by a low-profile Israeli startup called Qumranet (pronounced: coom-rah-net), which was formerly known as Comanet. The company was founded in 2005 by Benny Schnaider, Rami Ramir, Moshe Bar and Giora Yaron, and was sold to RedHat in 2008 for $107 million (The KVM software was initially written by Avi Kivity).
KVM is a Type 1 hypervisor. If you are not familiar with hypervisor types, there are 2. I will let you guess what they are called. Type 1 hypervisors run directly on a host to control underlying hardware and manage guest VMs (i.e. KVM, ESXi, Hyper-V). Type 2 hypervisors run on top of a standard operating system (i.e. VirtualBox/VMware Fusion). “KVM is one of the most popular open-source virtualization technologies in use today - the first to be integrated into the vanilla Linux kernel. Both IBM and Red Hat use it as the basis for their Linux virtualization technologies, and it is the most widely used virtualization technology in the OpenStack cloud as well.” Source: http://www.eweek.com/cloud/how-did-kvm-virtualization-get-into-the-linux-kernel.html
My KVM Guide Part I: The Beginning

So, I started working at Nutanix a few weeks ago, and our platform ships with KVM by default. Cool… no problem, I can learn that, except for the fact that I could not find a very comprehensive resource online that takes you through from an overview of the architecture through configuration and example, tips, tricks, etc. Therefore, Jen will build her own.
So what exactly is KVM? The Kernel-based Virtual Machine (KVM) is an open source hypervisor that runs on Linux. It’s purpose in the world serves the same as that of ESXi or Hyper-V: a hypervisor that aids in the consolidation of physical servers into virtual machines for resource and cost savings.
While starting my search for applicable resources, I found what seems to be a promising book on QEMU, KVM, Xen + libvirt: http://qemu-buch.de/de/index.php?title=QEMU-KVM-Book
… if you speak German. The English translation was not so readable for me, but you could maybe fuddle your way through it. KVM installation is covered pretty thoroughly at the following site: http://pacita.org/books/server-setup/output/pdf/doc.pdf
9.17.2014
UCS Central/UCSM Interop Support
The following table displays which UCSM versions are compatible with UCS Central 1.1(2a)/1.2(1a):
http://www.cisco.com/c/en/us/td/docs/unified_computing/ucs/ucs-central/users-manual/1-2/b_CiscoUCSCentral-Software-UserManual-Release1-2/b_CiscoUCSCentral-Software-UserManual-Release1-2_chapter_01.html#reference_D313A261A3404737BDFED19CECD0FD8B
http://www.cisco.com/c/en/us/td/docs/unified_computing/ucs/ucs-central/users-manual/1-2/b_CiscoUCSCentral-Software-UserManual-Release1-2/b_CiscoUCSCentral-Software-UserManual-Release1-2_chapter_01.html#reference_D313A261A3404737BDFED19CECD0FD8B
9.15.2014
Registering UCS Domains with UCS Central
And now for the moment we've all been waiting for :]
UCS domains need to be registered with UCS Central in order for them to be managed through the server. Upon registration, you can elect which policies/configurations you want to be managed by UCS Central and which ones you want to keep local to UCSM. Each registered domain can have specific policies/configurations managed by UCS Central; you don't need to have the same global/local configurations across all UCS domains. The following is a list of items that can be managed:
-Infrastructure and Catalog Firmware
-Time Zone Management
-Communication Servers
-Global Fault Policy
-User Management
-DNS Management
-Backup and Export Policies
-Monitoring
-SEL Policy
-Power Allocation Policy
-Power Policy
You should also review the Consequences of Policy Resolution Changes/Consequences of Service Profile Changes on Policy Resolution tables so an understanding of how things work with UCS Central can be had:
http://www.cisco.com/c/en/us/td/docs/unified_computing/ucs/ucs-central/deployment-guide/1-0/b_UCSC_Deployment_Guide_10/b_UCSC_Deployment_Guide_10_chapter_0100.html#reference_E5D010B53E054876BDA0FD9D75A92E35
There are a couple of prerequisites for registering a UCS domain with UCS Central:
1. Configure an NTP server and ensure that Central and UCSM are in sync. Make sure the timezones match as well, else you will end up with an FSM failure:

You can verify the time from the CLI of both nodes:
ucs-esc-n25-B# show clock
Sun Sep 14 09:48:38 EDT 2014
central# show clock
Sun Sep 14 13:56:40 UTC 2014
Why do I have 2 servers in PST timezone configured for everything but PST timezone? :]
It is obviously recommended to configure Central and UCSM to point to an NTP server, but if you need to change the time manually on both servers, you can SSH to the CLI and perform the following:
ucs-esc-n25-B# scope system
ucs-esc-n25-B /system # scope services
ucs-esc-n25-B /system/services # set clock sep 14 2014 11 29 00
NTP Configuration for UCS Central can be found in the Operations Management tab ->Domain Groups -> [Domain Group] -> Operational Policies:

NTP Configuration for UCSM can be found under the Admin tab -> Time Zone Management:

2. Gather your Central and UCSM IPs as well as the Central shared secret (Shhh... it's a secret!)
**Note: You cannot change your UCSM IP address while it is registered with UCS Central. If this needs to be done for whatever reason, you need to unregister, change and re-register back up with Central.
In order to register your domain, launch UCSM and navigate to the Admin tab -> Communication Management -> UCS Central

Click on Register with UCS Central.

You will be presented with a dialogue box to enter the UCS Central server IP address and shared secret.

And then...


And of course if you would like to unregister your UCS from Central, simply click on the 'Unregister from UCS Central' button. **Note: If the registered Cisco UCS domains have a latency of greater than 300ms for a round trip from Cisco UCS Central, there might be some performance implications for the Cisco UCS domains.
UCS domains need to be registered with UCS Central in order for them to be managed through the server. Upon registration, you can elect which policies/configurations you want to be managed by UCS Central and which ones you want to keep local to UCSM. Each registered domain can have specific policies/configurations managed by UCS Central; you don't need to have the same global/local configurations across all UCS domains. The following is a list of items that can be managed:
-Infrastructure and Catalog Firmware
-Time Zone Management
-Communication Servers
-Global Fault Policy
-User Management
-DNS Management
-Backup and Export Policies
-Monitoring
-SEL Policy
-Power Allocation Policy
-Power Policy
You should also review the Consequences of Policy Resolution Changes/Consequences of Service Profile Changes on Policy Resolution tables so an understanding of how things work with UCS Central can be had:
http://www.cisco.com/c/en/us/td/docs/unified_computing/ucs/ucs-central/deployment-guide/1-0/b_UCSC_Deployment_Guide_10/b_UCSC_Deployment_Guide_10_chapter_0100.html#reference_E5D010B53E054876BDA0FD9D75A92E35
There are a couple of prerequisites for registering a UCS domain with UCS Central:
1. Configure an NTP server and ensure that Central and UCSM are in sync. Make sure the timezones match as well, else you will end up with an FSM failure:
You can verify the time from the CLI of both nodes:
ucs-esc-n25-B# show clock
Sun Sep 14 09:48:38 EDT 2014
central# show clock
Sun Sep 14 13:56:40 UTC 2014
Why do I have 2 servers in PST timezone configured for everything but PST timezone? :]
It is obviously recommended to configure Central and UCSM to point to an NTP server, but if you need to change the time manually on both servers, you can SSH to the CLI and perform the following:
ucs-esc-n25-B# scope system
ucs-esc-n25-B /system # scope services
ucs-esc-n25-B /system/services # set clock sep 14 2014 11 29 00
NTP Configuration for UCS Central can be found in the Operations Management tab ->Domain Groups -> [Domain Group] -> Operational Policies:
NTP Configuration for UCSM can be found under the Admin tab -> Time Zone Management:
2. Gather your Central and UCSM IPs as well as the Central shared secret (Shhh... it's a secret!)
**Note: You cannot change your UCSM IP address while it is registered with UCS Central. If this needs to be done for whatever reason, you need to unregister, change and re-register back up with Central.
In order to register your domain, launch UCSM and navigate to the Admin tab -> Communication Management -> UCS Central
Click on Register with UCS Central.
You will be presented with a dialogue box to enter the UCS Central server IP address and shared secret.
And then...
And of course if you would like to unregister your UCS from Central, simply click on the 'Unregister from UCS Central' button. **Note: If the registered Cisco UCS domains have a latency of greater than 300ms for a round trip from Cisco UCS Central, there might be some performance implications for the Cisco UCS domains.
9.14.2014
Hardware and Software Interoperability Matrices
Great reference for hardware/software interoperability on UCS: http://www.cisco.com/en/US/products/ps10477/prod_technical_reference_list.html
UCS System Pre-Login Banner
Have you ever wanted to configure a pre-login banner for your UCS system? I haven't, but for those of you that would like this added verbiage in your environment, here's how:
-Navigate within UCSM to the Admin tab -> User Services -> Banners tab.
 -Click on the Create Pre-Login Banner Action, and enter a message in the pop-up box. Only text is currently supported with this feature.
-The banner will appear for both GUI and CLI system-wide logins.
-Navigate within UCSM to the Admin tab -> User Services -> Banners tab.

-The banner will appear for both GUI and CLI system-wide logins.
UCS Central Shared Secret... Shhh! It's a secret.
The UCS Central shared secret is used for authenticating a UCS domain with the Central server. It is only needed for initial registration. If you happen to change your shared secret, UCS domains that are already registered with UCS Central will not be affected. If you need to reset the shared secret, the following procedure can be used:
central# connect local-mgmt
Cisco UCS Central
TAC support: http://www.cisco.com/tac
Copyright (c) 2011-2014, Cisco Systems, Inc. All rights reserved.
The copyrights to certain works contained in this software are
owned by other third parties and used and distributed under
license. Certain components of this software are licensed under
the GNU General Public License (GPL) version 2.0 or the GNU
Lesser General Public License (LGPL) Version 2.1. A copy of each
such license is available at
http://www.opensource.org/licenses/gpl-2.0.php and
http://www.opensource.org/licenses/lgpl-2.1.php
central(local-mgmt)# set shared-secret
Enter the Shared Secret :
Confirm Shared Secret :
central(local-mgmt)#
**Note: The shared secret must contain characters from at least three of the following classes: lower case letters, upper case letters, digits and special characters. It cannot be based off of a dictionary word.
central# connect local-mgmt
Cisco UCS Central
TAC support: http://www.cisco.com/tac
Copyright (c) 2011-2014, Cisco Systems, Inc. All rights reserved.
The copyrights to certain works contained in this software are
owned by other third parties and used and distributed under
license. Certain components of this software are licensed under
the GNU General Public License (GPL) version 2.0 or the GNU
Lesser General Public License (LGPL) Version 2.1. A copy of each
such license is available at
http://www.opensource.org/licenses/gpl-2.0.php and
http://www.opensource.org/licenses/lgpl-2.1.php
central(local-mgmt)# set shared-secret
Enter the Shared Secret :
Confirm Shared Secret :
central(local-mgmt)#
**Note: The shared secret must contain characters from at least three of the following classes: lower case letters, upper case letters, digits and special characters. It cannot be based off of a dictionary word.
9.12.2014
UCS Central Licensing
UCS Central licensing is based on the number of UCS domains that are registered with the server. UCS Central comes by default with a 120 day grace period license, which can accommodate up to 5 UCS domains for free. "If you register any domain after the fifth, you get a 120 grace period for each new registered domain." Once the grace period ends for the domains, you will need an active domain license installed on the server in order to continue managing your UCS environments. The grace period timer starts on the day you register a UCS domain. The 120 grace period license days do not need to be used in succession (i.e. - You can register a UCS domain for 20 days, unregister it, and whenever you decide to register it again, it will pick up at the 20 day mark where it left off.)
Initial License: Includes the initial activation license for UCS Central and five domain licenses. You cannot remove this license is installed on the system. (L-UCS-CTR-INI=)
Domain License: UCS domains that are registered with UCS Central beyond the initial five will each need to have a domain license purchased and installed. **Domain licenses are domain specific. Once license is allocated, it can only be used with that particular domain. (L-UCS-CTR-LIC=)


Types of UCS Central licenses
Initial License: Includes the initial activation license for UCS Central and five domain licenses. You cannot remove this license is installed on the system. (L-UCS-CTR-INI=)
Domain License: UCS domains that are registered with UCS Central beyond the initial five will each need to have a domain license purchased and installed. **Domain licenses are domain specific. Once license is allocated, it can only be used with that particular domain. (L-UCS-CTR-LIC=)
License Installation
In order to install a license in UCS Central, launch the web interface, navigate to Operations Managements -> License Management. You will notice there is a specific GUID associated with each UCS Central installation (you will need this to obtain the initial license). You can upload your license to the server by click the Download button within the license tab (it's not so obvious), and browse for the license file you want to install (local and remote options are available):
You can take a peek at the Download Tasks tab to monitor the status of the license file upload. Licenses that are available for installation will be flagged as "Validated" in the Overall License Status column. You can select which license you want to install, click Install. Likewise if you want to delete a license from the system, you can select it from the list of licenses and select Delete. Make sure you unregister the UCS domain from UCS Central before deleting the license. **Note: At present, this licensing structure applies to both UCS Classis and UCS Mini chassis.
UCS Central Password Reset ISO
I know exactly what my admin password, but what if happen to forget it one day. There is a Password Reset ISO that can be downloaded from cisco.com for this purpose. Let's take a look at what happens when you boot to it.

*The only way I could get into this utility was pressing F6 to get to the boot menu and selecting my virtual DVD drive. Working to see if there is something wrong with the .iso, or perhaps just my machine.
Once loaded, it is pretty straight forward:

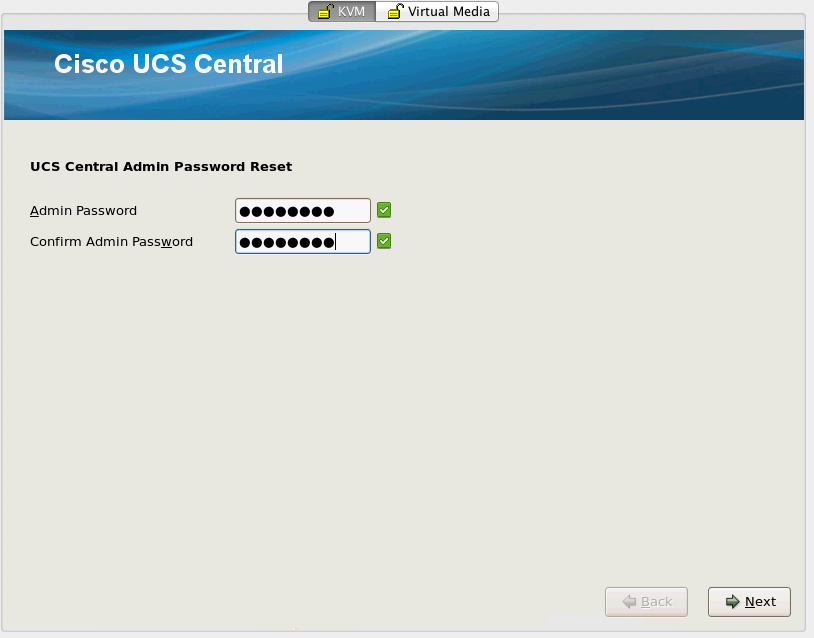
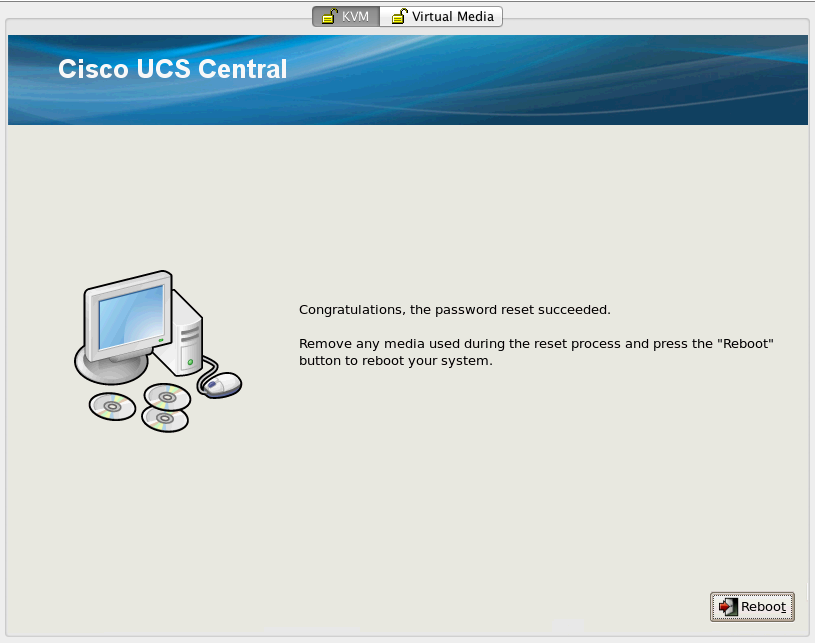
*The only way I could get into this utility was pressing F6 to get to the boot menu and selecting my virtual DVD drive. Working to see if there is something wrong with the .iso, or perhaps just my machine.
Once loaded, it is pretty straight forward:
UCS Central Upgrade: 1.2(1a)
After downloading the appropriate .iso file for your UCS Central upgrade (the most current version is 1.2(1a)), map it to your server, and reboot.

Some details you need to consider from the Upgrade Guide:
-You can only upgrade to 1.2(1a) from either 1.1(1b) or 1.1(2a)
--Clear the browser cache after logging into the UCS Central web interface
-You must upgrade from 1.1 to 1.2 versions in standalone mode (cluster mode can be enabled from the loca-mgmt CLI level)
-You can only use the ISO image upgrade (Provider Bundle is not longer in use)
-UCS Central 1.2 supports UCSM 2.1(x), 2.2(x) and 3.0. Upgrade UCSM BEFORE UCS Central, or deal with mismatched version faults and missed updates on UCSM side
-Be aware that once you upgrade, you cannot downgrade :]
Source: http://www.cisco.com/c/en/us/td/docs/unified_computing/ucs/ucs-central/install-upgrade/1-2/b_UCSC_Install_and_Upgrade_Guide_1-2/b_UCSC_Install_and_Upgrade_Guide_1-2_chapter_0110.html#concept_B130CCED6E5F400A872CA19557D8A2CF
Again we are presented with the option to install or upgrade, as was seen in the Installation post. This time we are going to elect to "Upgrade existing Cisco UCS Central".


Let's move on to configuring this bad boy...
Some details you need to consider from the Upgrade Guide:
-You can only upgrade to 1.2(1a) from either 1.1(1b) or 1.1(2a)
--Clear the browser cache after logging into the UCS Central web interface
-You must upgrade from 1.1 to 1.2 versions in standalone mode (cluster mode can be enabled from the loca-mgmt CLI level)
-You can only use the ISO image upgrade (Provider Bundle is not longer in use)
-UCS Central 1.2 supports UCSM 2.1(x), 2.2(x) and 3.0. Upgrade UCSM BEFORE UCS Central, or deal with mismatched version faults and missed updates on UCSM side
-Be aware that once you upgrade, you cannot downgrade :]
Source: http://www.cisco.com/c/en/us/td/docs/unified_computing/ucs/ucs-central/install-upgrade/1-2/b_UCSC_Install_and_Upgrade_Guide_1-2/b_UCSC_Install_and_Upgrade_Guide_1-2_chapter_0110.html#concept_B130CCED6E5F400A872CA19557D8A2CF
Again we are presented with the option to install or upgrade, as was seen in the Installation post. This time we are going to elect to "Upgrade existing Cisco UCS Central".
Let's move on to configuring this bad boy...
UCS Central Installation: 1.1(2a)
Documenting the UCS Central installation of 1.1(2a) (so I can afterwards document the upgrade procedure to 1.2(1a)). I elected to install UCS Central via the .iso onto a standalone rackmount server. The installation guide suggests installing UCS Central on a VM, but I have a spare server that I can dedicate for this purpose.


Whoops... I had not logged into the server in some time, so ensure that you have the appropriate drive configuration set up. Go ahead and take a look at the installation prerequisites before you begin:
http://www.cisco.com/c/en/us/td/docs/unified_computing/ucs/ucs-central/install-upgrade/1-1/b_UCSC_Installation_and_Upgrade_Guide_11/b_UCSC_Installation_and_Upgrade_Guide_11_chapter_010.html

Let's try this again.

Better. :]


Before I do any further configuration/UCSM integration/posts on cool things you can do with UCS Central, I am going to document the upgrade procedure to 1.2(1a).
Whoops... I had not logged into the server in some time, so ensure that you have the appropriate drive configuration set up. Go ahead and take a look at the installation prerequisites before you begin:
http://www.cisco.com/c/en/us/td/docs/unified_computing/ucs/ucs-central/install-upgrade/1-1/b_UCSC_Installation_and_Upgrade_Guide_11/b_UCSC_Installation_and_Upgrade_Guide_11_chapter_010.html
Let's try this again.
Better. :]
...And that's pretty much it :] You can check out the first boot up below:
I am going to setup a new standalone configuration as this is a new UCS Central server in my environment. The installer walks you through some of your basic "new server" questions - IP, mask, gateway, hostname, DNS, passwords. You can also elect to enable Statistics Collection. According to the User Manual: "Cisco UCS Central collects and aggregates statistics data on Network, Temperature, Cooling and Power from the registered Cisco UCS domains."
Nonetheless, after you make it through the install, the UCS Central server reboots to apply the configuration that was specified. You can then either log in from the CLI, or browse to the IP that was specified and check out the web interface (the login screen is very similar to the C-Series CIMC interface).
Before I do any further configuration/UCSM integration/posts on cool things you can do with UCS Central, I am going to document the upgrade procedure to 1.2(1a).
9.18.2013
VCE VBlock Visio Stencils
Looking for some way to showcase your VBlock in your existing Visio diagrams? Look no further. I have put together some stencils of VCE Vblock environments that you can simply import to Visio and drag into your existing network diagrams.
Here are some examples of what you will find:
VBlock100 BX-4P:

VBlock300 FX Base:

VBlock700:

VBlock 100: https://sites.google.com/site/vcevblockvisiostencils/VBlock100.vss?attredirects=0&d=1
VBlock 700MX: https://sites.google.com/site/vcevblockvisiostencils/VBlock700MX.vss?attredirects=0&d=1
**Note: I am trying to shrink down the size of the VBlock 300 files so that they can be posted within sizing limits. Stay tuned.
Here are some examples of what you will find:
VBlock100 BX-4P:

VBlock300 FX Base:

VBlock700:

VBlock 100: https://sites.google.com/site/vcevblockvisiostencils/VBlock100.vss?attredirects=0&d=1
VBlock 700MX: https://sites.google.com/site/vcevblockvisiostencils/VBlock700MX.vss?attredirects=0&d=1
**Note: I am trying to shrink down the size of the VBlock 300 files so that they can be posted within sizing limits. Stay tuned.
7.25.2013
C-Series Rack Mount Integration with UCSM
Few things to keep in mind when integrating a rack mount server with UCSM:
-CIMC settings must be reset to factory defaults
-As long as you configure the cable management per the Cisco documentation, the server will automatically be discovered by UCSM (just as if you inserted a new blade)
-If you need to decommission a rack mount server for any reason and what to again integrate it with UCSM, don't forget to recommission it from the decommissioned tab
-The VIC card needs to be P81E or 1225 (NOT 1225T)
-SFPs should be the same on FEX and server side (I used Twinax cables in my environment, which are also supported)
-C-series server needs to be running firmware version 1.4(6) or later.
Will add more tips to this post as I run into them.
-CIMC settings must be reset to factory defaults
-As long as you configure the cable management per the Cisco documentation, the server will automatically be discovered by UCSM (just as if you inserted a new blade)
-If you need to decommission a rack mount server for any reason and what to again integrate it with UCSM, don't forget to recommission it from the decommissioned tab
-The VIC card needs to be P81E or 1225 (NOT 1225T)
-SFPs should be the same on FEX and server side (I used Twinax cables in my environment, which are also supported)
-C-series server needs to be running firmware version 1.4(6) or later.
Will add more tips to this post as I run into them.
7.22.2013
Belkin KVM Switch
More so for my own knowledge...
In order to switch between the hosts connected to a Belkin KVM switch: SCROLL LOCK, SCROLL LOCK, up arrow/down arrow.
Alternatively, if you want direct access to a specific server you can do so with: SCROLL LOCK, SCROLL LOCK, 0 + server number. (i.e. If trying to view the console of server 2: SCROLL LOCK, SCROLL LOCK, 0, 2)
In order to switch between the hosts connected to a Belkin KVM switch: SCROLL LOCK, SCROLL LOCK, up arrow/down arrow.
Alternatively, if you want direct access to a specific server you can do so with: SCROLL LOCK, SCROLL LOCK, 0 + server number. (i.e. If trying to view the console of server 2: SCROLL LOCK, SCROLL LOCK, 0, 2)
7.17.2013
UCS Core File Exporter
Bet you didn't know about this...
UCS has a feature built-in that will allow for the export of core files off of the system as soon as they occur to a specified TFTP server. In order to configure this feature, known as the Core File Exporter, you will need to navigate in UCSM to the Admin tab -> Faults, Events and Audit Log -> Settings. On the right hand pane, you will see a Core File Exporter tab, which will need to be enabled.

One the feature is enabled, you will be able to enter the TFTP server hostname/IP and remote path.

Whenever a core file is written to the UCS system, it will be automatically be sent to the configured TFTP server.
This feature can also be enabled via the CLI: http://www.cisco.com/en/US/docs/unified_computing/ucs/sw/cli/config/guide/1.3.1/CLI_Config_Guide_1_3_1_chapter40.html#task_00981534E203404D9D4B547FF17D8FDB
Great feature for system monitoring and automatic export of core files to be included in TAC cases!
UCS has a feature built-in that will allow for the export of core files off of the system as soon as they occur to a specified TFTP server. In order to configure this feature, known as the Core File Exporter, you will need to navigate in UCSM to the Admin tab -> Faults, Events and Audit Log -> Settings. On the right hand pane, you will see a Core File Exporter tab, which will need to be enabled.

One the feature is enabled, you will be able to enter the TFTP server hostname/IP and remote path.

Whenever a core file is written to the UCS system, it will be automatically be sent to the configured TFTP server.
This feature can also be enabled via the CLI: http://www.cisco.com/en/US/docs/unified_computing/ucs/sw/cli/config/guide/1.3.1/CLI_Config_Guide_1_3_1_chapter40.html#task_00981534E203404D9D4B547FF17D8FDB
Great feature for system monitoring and automatic export of core files to be included in TAC cases!
7.01.2013
Rehost Nexus 1000v Licenses in Minutes
We have all been there. Nexus 1000v license re-hosting because something happened to our VSM and we needed to re-install... the LUN got corrupted... the host-ID magically changed somehow... etc, + hours on the phone trying to accomplish this task. Instead of opening up a Licensing case, you can actually complete the re-host via Cisco's License Administration Portal in under 5 minutes!
You can access the portal via the following link: https://tools.cisco.com/SWIFT/LicensingUI/lookupLicenseForRehost
Once you log in, the link will take you directly to the 'Initiate a Rehost' option. There are few other options available from the menus atop the page. You will need to check the box next to the license file you would like to transfer/rehost (you can differentiate by Host ID in the case of a 1000v license).


This procedure will greatly expedite the time it takes to rehost the 1000v licenses!
You can access the portal via the following link: https://tools.cisco.com/SWIFT/LicensingUI/lookupLicenseForRehost
Once you log in, the link will take you directly to the 'Initiate a Rehost' option. There are few other options available from the menus atop the page. You will need to check the box next to the license file you would like to transfer/rehost (you can differentiate by Host ID in the case of a 1000v license).

After you click next, you will be prompted to enter the new Host ID of your VSM:

The final page is a review of the changes you submitted. Ensure that the Target Host ID is accurate. You will need to view and agree to Cisco's Software License Agreement. At that point you can click Submit and you will receive a confirmation pop-up. Your new license file will be emailed to the address associated with your cisco.com account, and you can go ahead and upload the new license file(s) to the VSM.

6.28.2013
vCenter Reports Interface is Blocked... but Interface is Up!
There appears to be a condition in the Nexus 1000v switch where vCenter will report interfaces on the DVS as Blocked, but verification from the VSM/VEM side show that they are in fact up and passing traffic. This issue is tracked in Cisco defect ID: CSCub11514.
You can verify that the N1K interface is up in the forwarding state with the use of the 'vemcmd show port' output. The workaround for this issue is to navigate to the Networking view of vCenter, select your N1K switch, click on the Ports tab, and then click on the blue 'Start Monitoring Port State'. If you are hitting this issue, the interface will immediately switch to Link Up. You can 'Stop Monitoring Port State' after the workaround has been performed.

You can verify that the N1K interface is up in the forwarding state with the use of the 'vemcmd show port' output. The workaround for this issue is to navigate to the Networking view of vCenter, select your N1K switch, click on the Ports tab, and then click on the blue 'Start Monitoring Port State'. If you are hitting this issue, the interface will immediately switch to Link Up. You can 'Stop Monitoring Port State' after the workaround has been performed.

6.26.2013
Hey, Where's My Management IP Pool in UCS 2.1?
Starting in UCS version 2.1, the Management IP Pool has been relocated to the LAN tab. Under the Pools -> IP Pools section, you will find your previously created Management IP Pool.

Subscribe to:
Posts (Atom)